Whether we like it or not, virtual creative life is here to stay. Zoom, Facetime, MS Teams, Skype, etc.…they’re permanent fixtures in your tool kit, just like a word processor, your iPhone, or email. So, why not look and sound your best while “Zooming”? There’s nothing worse than pitching an idea or song while you’re fighting with unclear audio or distractingly bad video.
As with anything, the sky is the limit with how much time and money one can invest in virtual performance or meeting setups, but there are a few principles and pieces of equipment that anyone can benefit from.
General Zoom and Virtual Meetings
If your virtual meetings are generally centered around speaking, listening, and just being “seen,” you might be thinking, “Why do I need to bother with any of this? My laptop/phone works just fine.” While broadcast-ready content with Abbey Road-level audio might not be necessary, there are a few easy ways you can improve the quality of your calls and make sure your words, pitch, or idea are the focus of the meeting:
Best Lighting for Zoom Meetings
When it comes to lighting, you likely have everything you need to improve the look of your video already. Most importantly, avoid having your back to a window (or any strong light source) at all costs! This may seem obvious, but it’s an all too common mistake when on camera. Instead, use the natural light in a room to your advantage by facing it, putting your camera between you and the window. If your room layout doesn’t allow for this, a standard desk lamp to help illuminate your face and counteract any backlighting from your window can help the situation. If you’re interested in investing in lighting, there are many inexpensive LED lights available on Amazon. “Ring Lights” seem to be all the rage right now, but unless you’re going to mount your camera in the center of it to achieve the ring light “look,” they really aren’t necessary. Instead, look for a panel-style LED light, such as the Elgato Key Light.
Settings within Zoom and other Online Videoconferencing Platforms
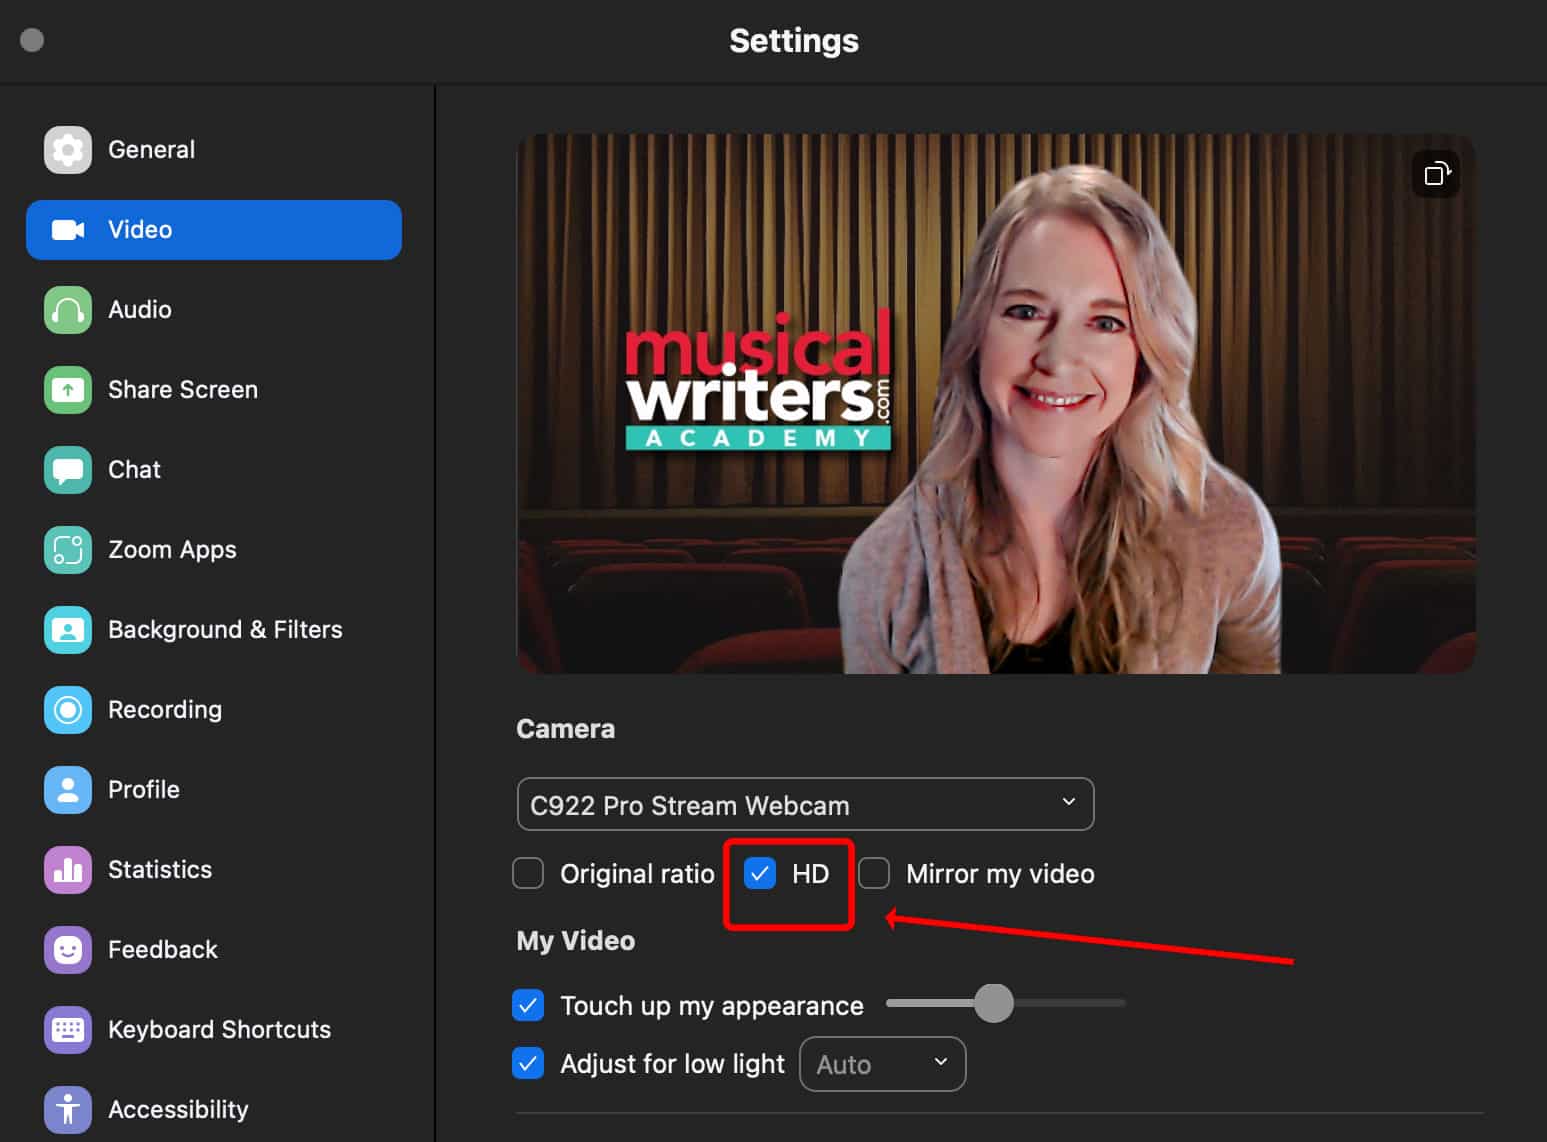
There are many adjustments that can be made in Zoom/Teams/etc. but perhaps the most important one is the “Enable HD Video” setting. If this isn’t selected, you won’t be getting the highest quality video possible out of your camera. Often times, the default is set to “off” to save bandwidth, but with a strong connection, you should be just fine with HD video turned on.
Other settings include background blur, background noise reduction, and mirroring/flipping your video. Experiment with these settings, but a quiet and well-lit setting will always turn out better than relying on noise reduction or a background blur to improve your virtual meeting environment.
Best Practices for Zoom Audio
As with lighting, you likely already have everything you need to capture high quality audio for spoken word. Firstly, always use headphones of some sort when on a call. This will prevent annoying echos or “loops” as your microphone picks up others speaking on the call. Most newer smartphones and laptops actually have surprisingly great microphones built right into them, so take advantage of this! As for your favorite pair of wireless bluetooth headphones (AirPods, etc) they actually only do one thing well and that’s allow you to hear your calls without any cables attached. However, it’s a little known that fact that most bluetooth headphones significantly degrade the quality of the audio you’re broadcasting. It’s an unfortunate limitation, but if you’re going to use your AirPods, go into the settings of your software and select the internal or built-in microphone of your device, instead of the mic in your bluetooth headphones. This way, you’ll be able to hear audio through your Bluetooth headphones, but you’ll be speaking into the higher quality microphone on your phone or computer! For a better set of over-ear headphones, I recommend the Sony MDR 7506.
Pro Level Video
While cameras on our phones and computers have greatly improved, there’s still no substitute for a DSLR or mirrorless camera with a great lens to capture professional video on a budget these days. Using one of these cameras can really set you apart in your virtual meetings as well. Not all DSLR or mirrorless digital cameras are cut out for this job, though! Unfortunately, most cameras weren’t designed with live-streaming/video conferencing in mind, but there are a few that will absolutely work. What you need to be successful are two things: 1. A “clean” HDMI output from your camera. This means that when the video signal is sent to another screen, it’s without all of the text and information you would normally see on the camera’s display (i.e. battery level, lens settings, ISO, time stamp, etc.) 2. An HDMI (or mini HDMI) output! Not all cameras have one and you’ll need one. Also, note that the USB port on your camera is not going to work the majority of the time.
So, you’ve got your camera, it has an HDMI port that allows for a “clean” signal, but you’re left with a cable that you can’t plug into your computer! Not to worry, there’s a final step and simple solution to this. Enter the video capture device. This will allow your camera’s HDMI signal to be converted and plugged into your computer via standard USB connection. There are many options for this, but the best and most reliable is the Elgato CamLink 4k. Once you’ve connected your camera, ensured that you’re sending a “clean” signal, you can now use your high quality, DSLR camera just like any other USB webcam!
This opens up a world of possibilities with your video. With the correct lens (I recommend Sigma lenses, as they are cheaper than Sony or Canon, but are very high quality), you can now achieve cinematic quality for your video calls and virtual performances!
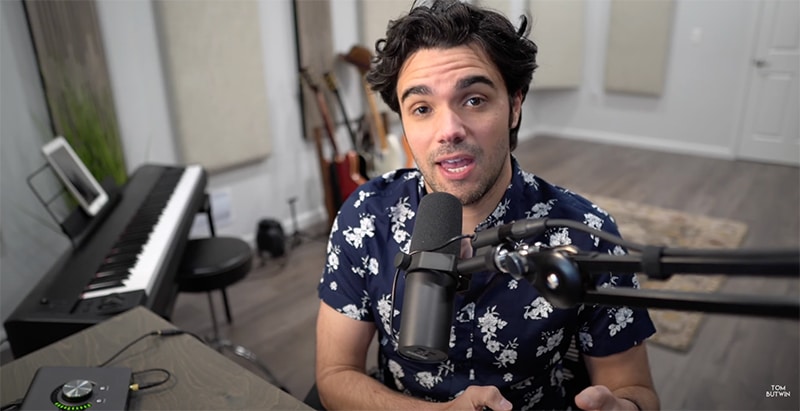
Here’s a video rundown of what I’m using (and how great it looks and sounds).
Gear Recommendations
- Camera: Sony Mirrorless APS-C line. There are many cameras in this line and they are all great. My favorite is the A6600, which I own.
- Lens: Sigma f/1.4 DC DN for Sony E Series
- CamLink 4K (connects camera via USB)
- Light: Elgato Key Light
- Headphones: Over the ear – Sony MDR 7506; In Ear – Shure SE425
- Microphone: With an Audio Interface: Shure SM58 ($99) or Shure SM7B ($300+)
- Audio Interface: (High End Music Production) Universal Audio Apollo X/X4 OR (Lower End) Apollo Volt Series (Any Model)
Online Pitching With Live Performance
Many of us in the creative world need to do more than just speak during our virtual meetings. If you’re a composer or musician, there’s a good chance you might need to pitch a song, perform virtually, or collaborate via a video conference. Some investment in equipment might be necessary, but if you’re a musician-type, you probably already have some equipment you can utilize.
To be really effective, you’ll need an audio interface. Ideally, your interface will have a couple analog inputs for a microphone (or 2) and an instrument. This will allow you to use the interface (instead of the built-in microphone) to send audio audio to your video conferencing software. Choose your favorite microphone, plug your instrument in, and you’re well on your way to greatly improved musical performance audio. If you’re highly advanced, and somewhat tech savvy, the gold-standard for virtual performance is centered around Universal Audio interfaces and their Console application. These interfaces are particularly unique and allow on to manipulate their sound in ways similar to a traditional audio mixing console (think reverb, equalization, and other effects being applied to your voice/instrument in real time for your Zoom calls). This type of setup is highly customizable, but also takes a lot of work to execute successfully. For pitching rough ideas and most scenarios, the first option of utilizing your existing audio interface is more than enough in most scenarios! Make sure you run some tests with a friend before your big call to do a virtual “soundcheck.”
One last note regarding settings in Zoom specifically, if you are using a higher quality microphone/interface setup, make sure you enable “Original Sound” and turn off any echo cancellation/noise reduction settings in Zoom. This will preserve your high quality audio!
Creating Demo Recordings
Recording professional quality music has never been more accessible or affordable than it is today. This is especially true when you’re trying to flesh out ideas or create demos of songs and ideas. The gold-standard, in my opinion, for demo creation is Apple’s GarageBand software. For non-Mac users, Audacity is a great free DAW (Digital Audio Workstation). If you do have a Mac, iPad, or even iPhone, you already have GarageBand for free! The desktop version is the most user-friendly, but the iOS versions are incredible too. Again, an audio interface is going to be a great addition to your arsenal to make demos and you certainly don’t have to break the bank. For those just delving into the world of audio interfaces, I recommend the Universal Audio Volt series or anything from Focusrite.
If you’d rather stick to writing and not worry about the world of audio engineering, that same high-quality microphone in your smart phone that works great for Zoom calls will actually get you an incredible demo as well. Experiment with where you place your phone in the room to get a good sound and balance of instruments/voices. For a great example of what’s possible with a Voice Memo demo recording, listen to Darren Criss’s “Lost Boys Life – Voice Memo” version.
Final Thoughts
Technology can be exiting and fun to learn, but don’t let it dictate or hinder your creative process. It’s really easy to get “Gear-itis” where one focuses more on acquiring all of the fun audio/video gear out there today rather than writing, performing, and creating. Have fun, enjoy the learning process, and let it enhance what you’re already doing.
**Tom Butwin is available for consultation sessions to troubleshoot or setup everything described here, as well as mixing/mastering services via his website (email booking@tombutwin.com).
We enjoy sharing content and resources that we know and love. MusicalWriters.com is an Amazon Associate and earns from qualifying purchases, so if you take action from an Amazon or other affiliate link, we earn a small percentage that helps keep MusicalWriters running.